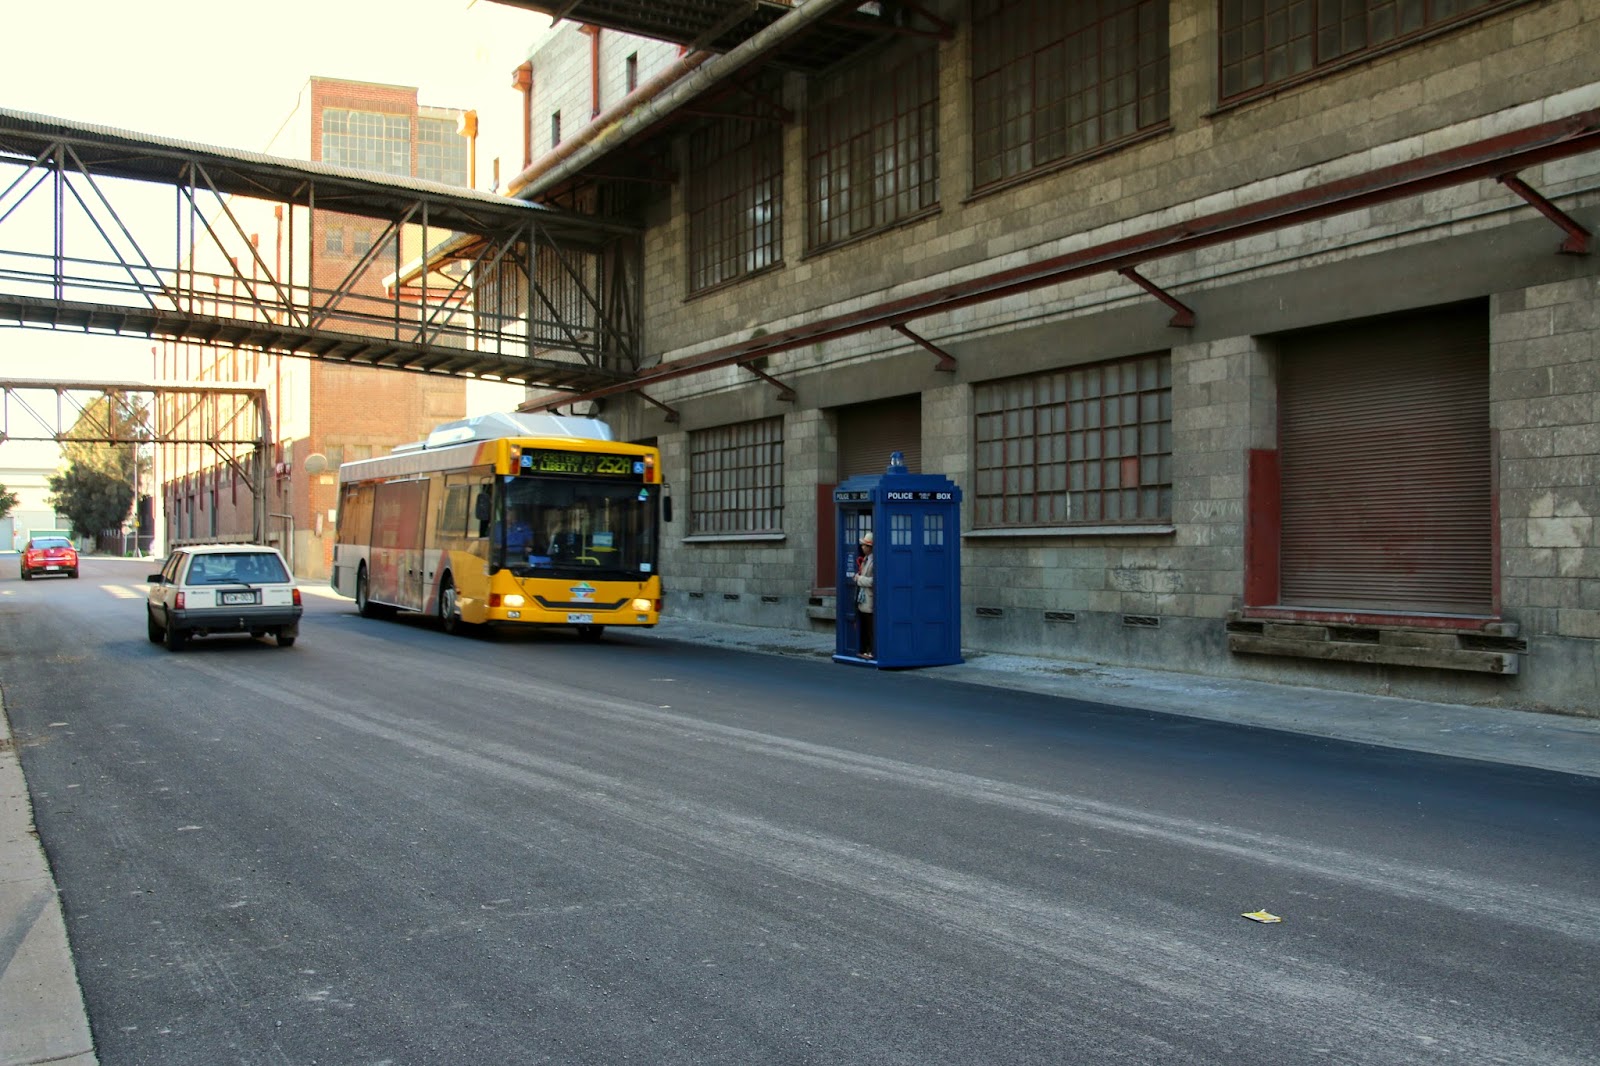
Sunday, April 8, 2012

Oz Comic Con

The inaugural Oz Comic Con hit Adelaide last weekend and the TARDIS was asked to attend. Well actually it was offered by the Australian Costumers Guild in kind for some stall space. I think we got the better end of the deal as the stall space we scored (4 bays) costs well over  a grand.


The TARDIS had prime position next to the photo booth just like at Armageddon and was used as the backdrop for literally thousands of photos. This year I installed the sound and light device as built last year for the ACG Ball and this time I had it set up so it be activated by remote control.


Special thanks to Eman once again for the excellent photos. You can check out lots of his excellent events photos on his FB page.
The TARDIS came home with many lipstick marks on it.The thing got some action that weekend!

Thursday, February 23, 2012

RiAus Fringe Event

In late January one of the folks from RiAus, or Royal Institution of Australia contacted me about their upcoming Fringe Festival event and wanted to see if they could secure the use of the TARDIS for a weekend. After a bit of to-and-fro we locked down an install on the Friday and take down the following Monday.

TARDIS set up in the RiAus auditorium
Friday rolled around and naturally it's 39 degrees and extremely hot. The Science Exchange (where RiAus is housed) is not an easy location to get a vehicle and we were pounced on by a parking inspector pretty quickly. We convinced him not to book us unless we were still there upon his return, which fortunately we weren't, having unloaded and backed out in time. I had to park quite a distance away however.

TARDIS install went together pretty well. Some scuffing of the paint work and one tiny broken piece of MDF and it was up. Apparently the host of the show is an avid Who fan and doesn't know that it's coming. It should be a good night!

Monday, September 5, 2011

Accurate light and the Australian Costumers Guild Ball

In an earlier post I mentioned I ran out of time and money to locate, and obtain a more accurate lantern for the top. Suffice to say, before the TARDIS's next public outing I wanted to rectify this. After trawling Ebay for weeks I finally found a suitable lantern. It's made of acrylic, and is a modern copy of the correct fresnelled marine lens (the originals were made of glass). Cost a pretty penny, but alas I wanted accuracy dammit! Especially now there was a spiffy light that actually worked.

So an afternoon of work and fitting, it was in. The uprights are the same dowels as before and the 'hat' or dome is actually a cheap plastic exterior light I came across at Stratco which just happened to be a perfect fit. Fresh coat of paint and we're done!

Thus the TARDIS is complete. However as the National Australian Costumers Guild Ball was approaching I was beginning to wonder about how to transport it. The last saga with getting it to Armageddon, I really did not wish to repeat, there had to be an easier way!

And there was... The roof and the sign boxes were already removable, I modified the sign boxes for the side slightly to make them 'slide' into place rather than screw in. With that modification, the side walls could be unscrewed at the corners and slid out. The front and back were unscrewed from the anchor points as single slabs (doors, sign boxes and all). These two are pretty heavy, but manageable. Then the base can be moved, so ultimately it came apart in 8 pieces and could be transported in the family trailer. No more hiring a trailer!


So here it is, complete and in place at the Australian Costumers Guild Ball, where it was a feature for our costume parade skit.

There was several doctors at this year's ball. Thanks again to Eman and to Catherine & David for the pics.


Additional Updates

After sitting under my pergola for some months following the TARDIS' debut at Armageddon Adelaide, I felt the time was nigh to add lighting to the interior and also to create an electronic sound board.

I'd been researching the soundboard idea on the net for some time, looking at a basic wiring video provided on YouTube by a guy in the USA (he's fond of 'soddering' whatever that is...)

Anyway this is his video:


So I was able to identify some of the parts and then order them online myself from Electronics123.com. The remaining parts I got from the local JayCar electronics here in Adelaide. 


Not quite as neat as this fellow's layout, but I incorporated my own into a black box that is mounted on the back wall of the TARDIS. It has a little more flexibility as there is a permanent line in jack, so I can either use the pre-saved TARDIS sound on the soundboard, or with a standard audio cable I can plug in a laptop, MP3 player, phone or whatever and play sound files through the TARDIS. There's also a permanent mounted powerboard inside to which the interior light is plugged in. So ultimately there are two lights, the lamp on top that lights up with the sound, and the standard interior light, which lights up the windows and the sign boxes. Very effective in low light!


I made a video like the one above of my own soundboard.


So at left is the TARDIS with the interior light on (with flash and without flash) sitting under my modified pergola. My wife was very understanding when I told her we had to add an extra peak to our pergola to accommodate the TARDIS. You may remember earlier posts that mentioned it wouldn't fit with the roof on. The shade cloth on the peak is covered with transparent plastic to keep the rain off. Only when it rains really heavily does the TARDIS get wet and even then only the bottom foot or so gets damp. The bottom has a very thick coating of paint, and realistically it rains that heavy only maybe 10 times a year so it should be okay for some time.

Friday, March 18, 2011

Armageddon Expo Adelaide

So the TARDIS had its debut at the first Armageddon Expo to be held in Adelaide. As I hadn't made it as dismantleable (is that a word?) as originally planned, I had to hire a trailer to transport it in almost full form.
But alas I hadn't counted on the fact that my carport roller door only goes 190cms high! The box is several inches taller than that! So we tried to tip it on its side, only to find the carport roof was not tall enough to enable it to even tip over without catching. I was close to accepting defeat until we realised we could push it out onto the backyard and tip it over. At this stage it weighs about 120kg I estimate. So we had to rest is sideways on a sack-truck and push/slide it out onto the trailer on its side. It then rode the entire way on its side in the trailer. At set up, it had encountered almost no damage from the journey thankfully, a little scuffed paint on the base at the back. So with four men at the other end we picked it up off the trailer and wheeled it in on its castors into the convention. The carpark was rough concrete and promptly disintegrated two of the castors. Oh well at least I didn't need the brakes on then.


So here it is , completed and on display at Armageddon Expo Adelaide. It was a massive hit with tonnes of people having their photos taken in front of it. I used it as a change-room and storage for my costumes and other stuff from the Costuming SA stand! People freaked out when I'd pop out of it. Most amusing. Here's Turncoat Studio's video of the con, featuring said Tardis.


Originally it was to be part of our stand, but the organisers essentially commandeered it and placed it near the photo booth and celebrity signing area. I wasn't fussed.


Getting it home was much easier now that we knew how to do it. Next up is to find a correct lens and to re-engineer it so I can dismantle it. I can't be spending over a hundred bucks each time to hire a trailer to take it places and needing another bloke to assist.


Here's some other pics. Emmanuel I hope you don't mind me using them ;)


Sunday, February 27, 2011

The End - Finished... for now.

This afternoon and evening I spent finishing the TARDIS. I bought a glass jar yesterday which has worked out perfectly for the top lamp, which was the last piece remaining. It's not fresnelled however, but does the job. At this stage a vegemite jar probably would has sufficed as I just wanted it finished!


The jar in place with some dowels and a round piece of MDF. It's supposed to have a dome shape on top, but I'm all out of domes, so I used a bog tin lid and glued it on.


And here is it painted and attached. It's probably off centre still, but I think looks the part. One day I'll put some kind of reflector inside and maybe even rig up a light.


The rest of the afternoon was spent putting the rippled glass effect in the bottom corners of every window frame. I used a broken skylight lens and cut it up using a cutting disc on a dremel. This puts out loads of fumes so I feel a bit off colour right now from it! Each window frame is slightly different so I had to make each one for a specific frame, required much filing (I cheated and used a bench grinder as a file). They certainly aren't perfect but most stick in without any glue.


So the TARDIS is finished! Alas I can't take a photo of it all complete because it's too tall for the porch and I need muscles to get it off the porch in the backyard. Next weekend at Armageddon I'll take some complete photos.


Special thanks to Frif and my Dad for help with some of the labour, the signage and with tools. Total cost of all parts, paint, fixings, is $699. It would probably have hit the grand if I had to pay for the window glazing and the top signs. Probably take a few bucks off too I guess, because I bought some things that I didn't end up using for this, but will no doubt use elsewhere in the future.


*I never bothered doing the corner post caps.

Saturday, February 26, 2011

Signs and windowframes

Well, the end is definitely in sight! My friend came through with the Police Box stickers, which we put on the white perspex backing. Now I was to learn that for some reason sticking vinyl to perspex is 100 times harder than sticking to glass. The spray bottle and detergent trick didn't actually help with sticking it on, but made it harder and as such there is quite a lot of small bubbling in the signs. It doesn't show from a few feet away, nor in pictures thankfully, but enough that it's mildly irksome for me. Anyway they're done. Alas the crispness of the signs now highlights that the signboxes are not perfect either. I guess as the creator I'm my own worst critic.


My friend wasn't able to get the phone panel sign done, but as this was a small and quick one we took a trip to the sticker guy at the Brickworks to make up. I had the file from somewhere on the net, but the signmaker altered it slightly for size, and also as he didn't have the correct fonts. Again, it's near enough. I think it looks pretty impressive on the panel. The 'Pull to Open' bit is probably a little large, but the sign's a good fit for the panel.


Today we did a test fit of the signboxes and the both roofs in place, we had to move the whole box down onto the paving so it could clear the porch roof. With several layers of paint the second roof panel no longer fits inside the first roof panel, so there will be some sanding to get that right. Also from above there's some spacing between the first roof and the signboxes they sit on, which I may fill with a piece of fabric or something. But then again unless you're nine feet tall you wouldn't see it.


I've just realised I forgot to make the corner post caps! Ahh it's never ending.


Anyway here's another photo, note that I finally made the window frames. I kind of cheated by making 2cm strips of MDF and just sticking them to the perspex and painting them afterwards. Yes I should have painted them first. There was a fair bit of cleaning required to get it off the glass again.There's no outer edging to the frames but at this stage I don't really care.


So remaining is the lamp (which I found a nice jar that is suitable), and the pebbled glass pieces for the corners of the window panes. I may have injured myself lifting the box down onto the paving. It's ridiculously heavy. I'm also rather concerned about how I'm going to get it out, given the carport roller door has a rather shallow opening height.